Friday, June 7, 2013

DIY Landscaping, Finished Product

Pieris Japonica

I had never seen this plant before we looked at it in the nursery.  It is an evergreen shrub has new growth in the spring that is colored red which slowly turns green during the summer.  In addition the plant produces groups of flowers that look like lilies of the valley during the early spring.  We chose this plant for its ability to cover the gas meter as well as for its beautiful spring foliage.  Placement of this plant is important as it prefers lower amounts of sun exposure and does not do well with high winds.

Mature Height: 4-5ft
Mature Width: 4-5ft

Hydrangea

Hydrangeas are pretty standard fare for landscaping.  They produce beautiful flowers and are fairly easy to cultivate.  Our specific brand of hydrangea is the endless summer variety.  One neat fact about hydrangeas is that the color of the flower indicates the type of soil you have.  With an acidic soil, pH<7, hydrangeas will produce blue flowers.  With a more basic, or alkaline soil, pH>7, hydrangeas will produce pink flowers.  We were a little concerned about the placement of this plant as the front of our house gets a lot of wind during the year, but so far we haven’t lost any flowers.
For more information on hydrangeas this site is great.  http://www.hydrangeashydrangeas.com/


Mature Height: Whatever Works, prune to size
Mature Width: Ditto

Little Princess Spirea

The Spirea is a deciduous shrub that is great for planting at the edges of landscaping.  It is a good candidate for planting under trees for ground cover.  Its small flowers are also very nice as they add a splash of pink color to your landscaping.

Mature Height: 3-4ft
Mature Width: 5-6ft

Pyramidal Juniper Shrub

Junipers are a fairly common staple in landscaping.  They are a hardy shrub that can tolerate a variety of conditions.

Mature Height: 15-30ft
Mature Width: 10ft

Burning Bush

The burning bush has got to be one of the most well known landscaping shrubs.  Its blazing red color is absolutely legendary and works as a nice focal point on that side of our landscaping.  One thing about the burning bush is that it takes a lot of work to keep it smaller.

Mature Height: 6-8ft
Mature Width: 4-6ft

Green Velvet Boxwood

The boxwood is a fairly versatile plant, and this variety works great for making a hedge.  In our case we placed them under our windows and along our walkway.

Mature Height: 3-4ft
Mature Width: 3-4ft

Blue Star Juniper

These little guys are great for ground cover.  In a few years they will completely block the view of our vent pipes.

Mature Height: 2-3ft
Mature Width: 3-4ft

Green Tower Boxwood

Another variety of boxwood, this one is great for growing tall.  We used it right next the to the slab outside of our front door.

Mature Height: 9ft
Mature Width: 1-2ft

Goldflame Spirea

This is another great variety of spirea.  This one will have new growth that is yellow and has bright pink flowers.

Mature Height: 3-4ft
Mature Width: 5-6ft

Dwarf Crimson Barberry

This little beauty stays red all season long.  This version of barberry stays small and is great underneath our blue spruce.

Mature Height: 2ft
Mature Width: 2ft

Blue Spruce on a Stick

This plant serves as a beautiful centerpiece.  It won't grow much bigger but it will become fuller.

Mature Height: 3-5ft
Mature Width: 5-6ft

Helmonds Pillar Barberry

This is another variety of barberry that works great to frame the garage and not take up a lot of space.

Mature Height: 3-4ft
Mature Width: 12-18in

Magic Carpet Spirea

This is another great spirea but will stay slightly smaller and works great next to the garage.

Mature Height: 18-24in
Mature Width: 2ft

Pyramidal Boxwood

This is another fantastic boxwood that are using to block the view of the AC compressor.

Mature Height: 4-5ft
Mature Width: 2-3ft

I like Turtles


Window Dressing

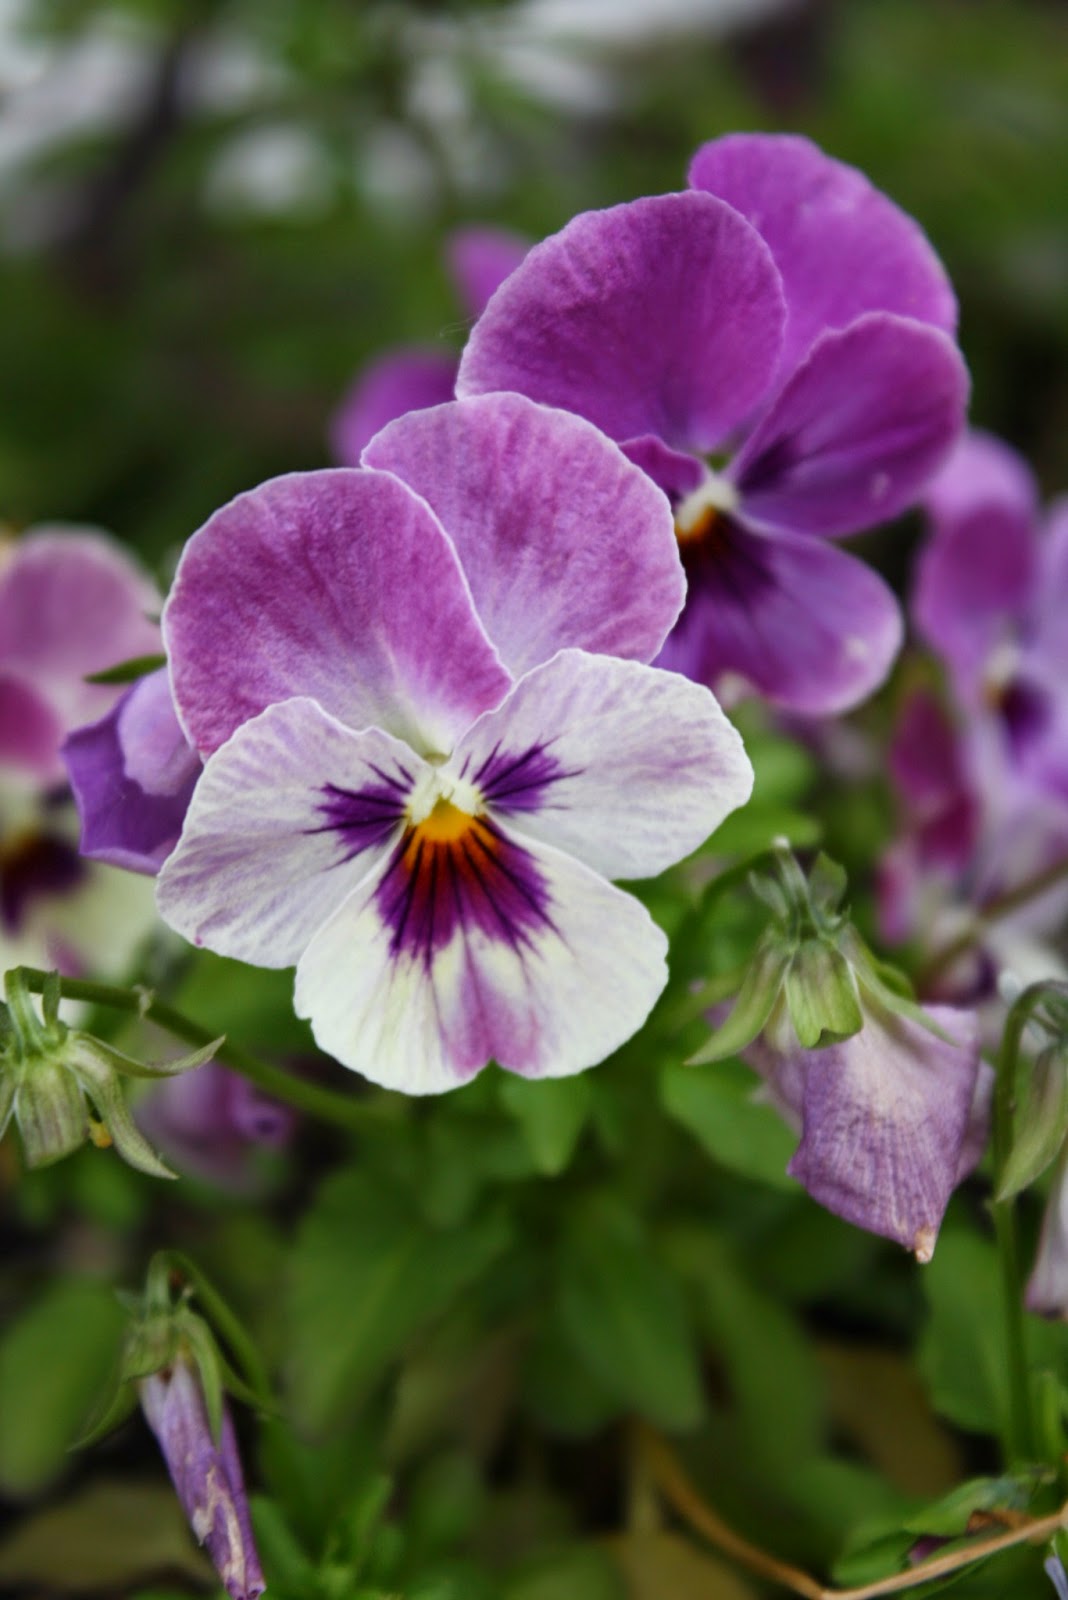
Here are a few nice pictures of the annuals that are around.


The Big Picture

Here are some final photos of our landscaping.  I hope you enjoyed our crazy adventure and maybe it even inspired you.


Posts in this series
Design
Prep Work
Planting

Thursday, June 6, 2013

DIY Landscaping, Planting

The Road So Far

So in the last couple of posts we talked about designing, and prepping the landscaping.  Now is when things start so shape up as we plant our shrubs and trees.  So to get started move all the plants into their respective locations to get a feel for how things are going to look.  This will help to ensure that everything is in the right place and is a great time to make any last minute changes.

Moving on Up

This is not typical, but in our situation we needed to move one of our trees.  This activity is not for the faint of heart, so if you have any reservations try to get a professional to move the tree for you.  Since we are out of our minds we decided to do it ourselves.  Start by watering the tree a good amount of time before you plan to move it.  Some balance is needed here because you want the soil to be easy enough to dig through, but not so water logged that it's a lot of extra work.  Now our tree was just planted the previous summer so it's root system was not established as much as an older tree would be.  If you are planning on transplanting a more established tree start here.  You need to do some prep work a few years in advance for that to work out well.

Start by digging around your tree several feet away from the trunk, and dig a few feet down until you have a nice trench made.  Then start removing dirt from around the center island a few inches at a time until you have reached the root ball.  You'll know when you have hit the root ball because the few roots that you have encountered so far will become very dense.  In our case things were made a little easier because when the tree was planted the cage was left intact.  The root ball was then very easy to identify.  At this point you should have dug under the tree a fair amount.  By placing a shovel under the root ball, you should be able to move the tree fairly easy.  If this is not the case continue digging under the tree until you are able to tip it over.  Once you are able to do that wrap the root ball with a large piece of burlap.  This will keep the root ball together better, and also make moving the tree easier.

You got the tree out, now you need someplace for it to go.  Dig a hole two to three times as wide as your root ball and a few inches shallower.  Cover the bottom of your hole with compost and press it down until you have a nice level surface.  You have now made a new home for your tree.

Now you need to get your tree out of the big hole that you just dug.  This is no easy task, but one thing that we did to make things simpler was to use the back fill and a 2x12 as a ramp.  At this point you want as much help as you can because that tree is gonna be heavy.  I recommend sliding the root ball along a 2x12 or any other surface that will allow you to slide the tree.  You can also roll the tree, but this can have a tendency to make the root ball crumble.  Slide the tree into it's new home and position it the way that you want.  Having the burlap in place makes this a lot easier.  We made the mistake of removing the burlap at this point and paid the consequences for that mistake.  It was very difficult to position the tree without it but got it eventually.  At this point finishing up transplanting the tree is very similar to planting shrubs to we'll move on to that.

Can You Dig It

Granted, planting shrubs is not the most difficult task, but there are a few things that you should be careful about.  Start by digging a hole that is 2 to 3 times the size of your container and a few inches shallower.  Make sure that you are not making a clay bowl for your plant.  If you start hitting very compacted clay you need to stop there.  It may mean that you have a higher landscaping bed, but you do not want your plants to have a hard time spreading their roots.  Fill the bottom of the hole with a few inches of compost and mix in some fertilizer as well.  We used holly tone for all of our shrubs based on the advice we received from the guys over at Northridge Nursery.  Now that you have supplied a good base for your plant remove it from the container.  The easiest way to do this is to tip the container over and slide the shrub out.  Do not try to pull the plant out of the container.  This can cause a lot of trauma to the plant.  If you are having a hard time with removing the shrub, hold the container with one hand while hitting the sides your other hand.  This will help to loosen the dirt and remove the shrub.  No while holding the shrub use a shovel to make a few notches at the bottom corners of the root ball.  This will help to stimulate new growth.  Place the root ball in the middle of your hole and start to back fill around the plant.  As you go you can mix in some compost to amend the soil, and also make sure to compress the soil around the root ball.  Once your have completely back filled your hole you can move onto the next shrub.  One important thing to not is to not put any soil on your root ball.  It is important for the crown of the roots to breath and covering it up will not allow that to happen.  Your new shrub should look like the illustration below.


It's Mulching Time

Filling in your landscaping bed with mulch is very similar to filling it with topsoil.  You'll want between 2-4" of mulch covering the entire landscaping bed.  Once you have applied all the mulch take the time to go over it with your hands and spread it out and pat it down.  This may take some extra time, but it helps to give your landscaping a nice polished look.  Also, along the edges make sure to press down the mulch really well so it won't wander off into your yard.  Now apply a weed preventer like preen on top of the mulch making sure to read the label for the right amount of application.  This will help keep the weeds to a minimum.  The last thing you need to do is water in the mulch.  Congratulations you have finished your own landscaping.

In the next post I will post some detailed pictures of the finished product as well as advice on continuing to take care of your landscaping.

Posts in this series
Design
Prep Work
Finished Product

DIY Landscaping, Prep Work

Visualize Your Design

As with any DIY project, prep work and planning can make or break your landscaping endeavors.  Now that the design has been more or less finalized it is time to do some prep work before we break ground.  The first thing to do is take a tape measure and some garden hose and mark out the approximate shape of the landscaping bed.  Use the tape measure the find key features of the design and layout the garden hose, making sure to not have sharp bends.  Around trees it is sometimes nice to have a well-shaped circular edge.  Any easy way to do this is with some string and a screwdriver.  Tie one end of the string around the screwdriver and drive the screwdriver into the ground where the tree will be.  Then hold the length of the string that you want, in our case we used 5ft, and slowly walk around the edge moving the garden hose into place at the end of your string.  This will give you a nice circular edge.  Make sure to leave the screwdriver in place as it will help later.  Once you have the general shape made, take a step back and look at your soon to be landscaping.  Make adjustments where needed continuing to keep in mind how everything looks from the street.

Marking Your Territory

Now it is time to use something more permanent to mark the edge of the landscaping bed.  A lot of people like to use chalk, but I ended up using water soluble paint.  You can pick these up at your local hardware store, but be sure to get paint that you can use while it is turned upside down.  Regardless of what you use, remember that it will either wash away or the grass will eventually grow and you won’t see it anymore.  Before you get started, if you plan on using edging take note of how long the garden hose is and how much you needed to mark out your landscaping.  You will need to get the same length of edging.  Start at one end of your garden hose and slowly move the hose out of the way and mark the ground with your paint or chalk where the hose was.  Depending on how long the hose was in place there may be a groove in the grass where the weight of the hose compressed the grass.  When you get to the areas that are circular use the screwdriver string trick to ensure you have a nice edge.  Continue around all the edges marking them as you go.  Now go back around the edge and smooth out any sharp bends or make any last adjustments to your landscaping bed perimeter.

Breaking Ground

If you have grass in your landscaping bed it needs to be removed.  Start by using a nice garden spade, go around your edges and remove the sod nearest the border.  You should have a good 6" border now where grass has been removed.  Continue to work inwards from you edge removing clumps of sod as you go.  If you need to save sod for anything, cut the edge of a 3ft x 6ft section out of the grass and starting at one end roll it up.  Set the sod aside somewhere in the shade and keep it moist.  Once you have removed all the grass, take a break and pat yourself on the back.  You should now have a feel for what your landscaping will look like.  If you have clay soil like we do you will need to take a shovel and turn over as much of the clay as possible.  This is fairly easy to do, just start at the edge of your landscaping bed and drive the shovel into the ground and pry up the soil.  Continue moving inward until you have overturned the soil.  Now use a roto-tiller, I really recommend using a power tool for this, and till up all the clumps of clay and the other soil in your bed.  This will help make for better drainage and your plants roots will love you for it.  Once all the roto-tilling is done use a garden rake to even out the soil and shape how the bed will slope away from your house.  Finally walk on the soil to make sure it becomes more compact, you don't need to tamp the soil, you just don't want a lot of settling later.

Get Out Your Calculator

The last part of prep work is figuring out how much soil and mulch you will need.  This part can be a little intimidating but is not too bad.  The easiest thing to do is to make a little sketch of you landscaping bed and then block out square sections following logical breaks in the shape of the bed.  Using a tape measure, measure the squares in your prepared bed and write them down.  Now calculate the square footage for each block and add them up.  This is your total square footage.  To find out the amount of top soil and mulch you will need multiply the square footage by the depth of topsoil/mulch in feet.  For us we did 6" or 0.5' deep topsoil and 2" or 0.167' deep mulch, giving us ~6 cubic yards of soil and ~2 cubic yards of mulch.  You'll notice that we didn't calculate the section on the side of the garage in our estimate.  This wasn't a big deal as it is a small area, and the overlap we had in using squares for approximation circles more than covered it.


If you don't have a truck or anyway of hauling the topsoil or mulch this step should be done well in advance of any other work on your landscaping.  This will give you an opportunity to schedule with your local landscaping outfit a time and date to delivery your needed supplies.  Even if you have a truck, topsoil is really heavy, up to 1 ton per yard, so plan accordingly.  We ended up taking 8 trips total to get all the topsoil and mulch that we needed in the half ton truck that we were able to borrow, 6 trips for topsoil, and 2 trips for mulch.  With the landscaping place being within 5 miles this was doable.  If you live farther away from your source of soil and mulch it may be cheaper and less of a headache to have them delivered.  You can also have them deliver the amount of edging that you calculated earlier and all your plants if you so desire.  A couple of notes:
     -When talking to the landscaping outfit ask them about what type of soil mixture they use when doing landscaping, it is typically not just topsoil, in our case a 50/50 mixture of topsoil and compost.
     -Landscaping places will typically have heavier duty edging as opposed to your hardware store, it is pricier, but well worth it.

Getting the Edge on Things

At this point most of the prep work is done, but there are a few more things to do before planting your shrubs.  So at this point if you decided to put in edging, now would be a good time.  The process is very simple but one thing you want to make sure is that there is a deep enough groove at the edge of you landscaping bed to fit the edging.  Then just place your edging up against the grass moving from one end of the landscaping bed to the other and place an edge union when you need to join two pieces.  Then you need to secure your edging so that you don't have issues during the winter months with lots of heaving.  I put my stakes in like illustration one, but after some research online I see that some people prefer to put the stakes in horizontal as in illustration two.  Thinking about it some, I wish I had done it this way, but if I have any issues in the spring I can reset my edging and try it that way.  Anyways, edging your landscaping will create a nice barrier from mulch ending up in your yard and weed/grass ending up in your landscaping.


Getting Down and Dirty

Adding the topsoil compost mixture to your landscaping is a fairly simple, but time consuming process.  A couple of notes:
     -Try to make sure that you have fairly even coverage, especially in the inner parts of your landscaping, you want your plants to benefit from the nice rich soil you just put down.
     -Back fill your edging to help keep it in place, be mindful to keep the level of dirt a few inches below the top edge of the edging so that you have room to add mulch later.
     -Walk the dirt in similar to what was done before, no need to compact the soil a lot just remove some of it's fluffiness.

At this point you are ready to start planting, more posts on that process coming soon.

Posts in this series
Design
Planting
Finished Product


Wednesday, June 5, 2013

DIY Landscaping, Design


It's landscaping time

So after looking at dirt of the front steps all winter it was time to do some landscaping.  After some thought and crunching of the numbers we decided that doing our own landscaping would be the most economical, and would also fit our schedule the best.  By the time we contacted the nursery, it was apparent that if they did everything for us it could easily have been half way through the summer before they could fit us onto the schedule.  Needless to say, that wasn't going to work.  In the next few posts I'm going to detail the process we went through in doing our own landscaping.  I'm sure we made several mistakes, but we tried to be very careful and pay as much attention on doing things right the first time.  I hope you enjoy it.

First Things First

For any project like this it is always important to have some kind of plan.  Now, while hard labor and planting shrubs doesn't intimidate me, designing the landscape felt a little out of my skill set.  So we shopped around a little bit until we found a landscaping design that we liked.  Most nurseries offer landscaping design services for free in the hopes that you will pay them to install the plants for you, but to be honest we made sure to tell them that we had plans on installing the landscaping on our own and they would only be supplying the plants and the design.  In the end we went with the design created by Northridge Nursery, a local nursery out of West Seneca, NY.  The staff there was very knowledgeable and courteous, and took the time to listen to our concerns and ideas.  I would definitely recommend them to anybody in the Buffalo, NY area looking for landscaping advice.

Original Design


Updated Design


So what's different?  Well let's first talk about what we switched.  We removed the three Gold Mop Chamaecyparis (Number 2), and replaced it with two Golden Flame Spirea.  This was mostly a personal preference but we wanted to stay with the yellow color in that area.  Next we also replaced the Euonymus Gaiety (Number 3), with a Norway Spruce bush, again staying with the original green color in that area.  Then we moved two of the Magic Carpet Spirea to the side of the garage to thin out under the flowering pear tree and to also fill in the small dirt area by the garage.  We then added a Peiris Japonica on the left side of the house to block the view of the gas meter.  Next came three Blue Star Junipers in front of the house for low ground cover and to block the view of the exhaust pipes in that area.  Lastly we added a columnar boxwood next to the door of the garage.  So what should you try to do when designing landscaping?  Here are some things that I learned through this process.

     -Have larger bushes/trees on the sides of your house with smaller bushes and shrubs moving towards the center of your house.  This frames your house in the landscaping.
     -Try to keep the colors in your plan balanced.  The main colors are Green, Yellow, Blue, and Red.
     -Be mindful of how well the plants you choose do in the conditions they will experience on your property.  Be especially mindful of the amount of sun each day, wind, and if the plants attract animals in your area.
     -Think about how the larger plants you have will cast shadows on plants that need a lot of sun, now and 10-20 years in the future.

Next Steps

Before digging any dirt it is a good idea to have a schedule of all the things that need to be done.  Our schedule looked something like this:
     -Mark landscaping boundary
     -Calculate square footage
     -Estimate amount of topsoil and mulch needed
     -Remove existing grass
     -Turn over soil and till
     -Install edging
     -Fill in landscaping bed
     -Move flowering pear tree
     -Layout shrubs
     -Plant Shrubs
     -Cover landscaping bed with mulch
     -Apply Preen
     -Water Landscaping

In the next couple of posts I will go over the specific details involved with each of these steps.

Posts in this series
Prep Work
Planting
Finished Product

Long Overdue Updates

So it's been a long time since I posted the last updates to this blog.  It'd like to say it's because I'm so busy, but mostly it's because I've procrastinated about updating the blog.  Over the last year or so we have been working on a lot of projects.  I hope that the work that we have done can give people ideas, or possibly answer questions they might have.  Some of the projects include:
     -DIY Landscaping
     -Custom DIY Garage Screen
     -Interior Painting
     -DIY Sliding Door Steps
     -Air Conditioner Install
Over the next week or so I want to write a detailed post about each project.  Here are a couple teaser pics showing the landscaping and garage screen.